Back and Forth
BYUCTF 2026
Obfuscation is for chumps
Files:
Solve
NOTE: This is a challenge that I wrote. I figured it would be good to actually host one of my own challenge writeups here rather than just writeups of everyone else’s only.
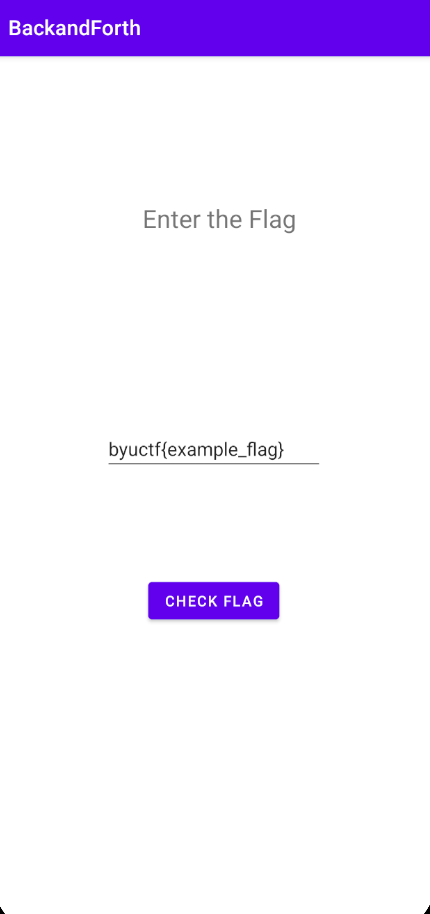
Starting off, you can run the app to interact with it! I used the Android Studio suite of tools, which will let you spin up an emulator and then install the app using adb, then you can see it! You get this nice window and then you can try submitting flags, which will give an error message on screen.
Throwing the app open in JADX, our MainActivity function has some basic details in it that help us track down the check. First, there’s a native library with the functions check1 and finalize. Then we have check2 in the Java and the main checkFlag function, which loads some wasm for check3Async. The function is below, then I’ll talk about all the parts:
1
2
3
4
5
6
7
8
9
10
11
12
13
14
15
16
17
18
19
20
21
22
23
24
25
26
27
28
29
30
31
32
33
34
35
36
37
38
39
 private void checkFlag(String flag, final Consumer<Boolean> callback) {
    WasmRunner runner = new WasmRunner();
    for (int i = 0; i < this.underscores.length; i++) { // **************_*******_*******_****_******_*****
        if ((Byte.toUnsignedInt((byte) (~flag.charAt(this.underscores[i]))) ^ 160) != 0) {
            callback.accept(false);
            return;
        }
    }
    int i2 = R.string.s;
    if (!flag.startsWith(getString(i2))) { // byuctf{*******_*******_*******_****_******_*****
        callback.accept(false);
        return;
    }
    if (!check1(flag)) {
        callback.accept(false);
        return;
    }
    if (!check2(flag)) { // byuctf{*******_*******_4ndr01d_****_******_*****
        callback.accept(false);
    } else {
        if (!finalize(flag)) {
            callback.accept(false);
            return;
        }
        ListenableFuture<Boolean> checkFuture = runner.check3Async(this, flag);
        Executor mainExecutor = ContextCompat.getMainExecutor(this);
        Futures.addCallback(checkFuture, new FutureCallback<Boolean>() { // from class: com.example.backandforth.MainActivity.1
            @Override // com.google.common.util.concurrent.FutureCallback
            public void onSuccess(Boolean result) {
                callback.accept(result);
            }

            @Override // com.google.common.util.concurrent.FutureCallback
            public void onFailure(Throwable t) {
                callback.accept(false);
            }
        }, mainExecutor);
    }
}
So I’ll cover each of these checks in the order that I think it makes sense to (not chronologically, probably in terms of simplicity). There are more than just 4, but idk how many at the time I’m writing this, we’ll see :)
underscores
It just checks that certain indices are underscores, nice.
flag.startsWith
This one uses a string resource to check that the flag starts with a certain value. This value is probably byuctf{, BUT you can track it down by finding the string s in the resources section in jadx (resources.arsc/res/values/strings.xml). You can search something like <string name="s">, which will bring you right to it.
Check 2
This one uses an embedded sqlite database to pull data, comparing it against the set of bytes from the database. You can find that database inside the Resources section of the apk in jadx, specifically Resources/assets/mydb.sqlite. Now, you can pull it out like a good person and read it using the sqlite cli, but you can also just strings it and you’ll find 4ndr01d and can then populate that into the flag. JADX will also show you the strings in the GUI.
Check 1
This is our first native code check and a weird one. It’s designed to help you with the flag but it’s a SHA256 hash but only checking every other character of the hash. Theoretically, this would add verification of the finished flag. You can extract the native code from the Resources/lib/*/libbackandforth.so (using whichever architecture you like). Then the functions you care about will have a prefix that lets Java find and use them, specifically one that matches the namespace of the application. For check 1, this is Java_com_example_backandforth_MainActivity_check1.
Note: I was wrong about this. I wrote the writeup as I solved it and made several mistakes. I’ll get into this part much later
1
uint64_t Java_com_example_backandforth_MainActivity_check1(_jstring* arg1, int64_t arg2, uint8_t* arg3)
Finalize
This is another native function, and it does two separate checks. It can be found in Java_com_example_backandforth_MainActivity_finalize in the same library. Both of these checks are the reason for the challenge’s original creation: you can have Java call C++ and then have that C++ go back and call Java functions, which I thought was really cool.
To call Java functions, C++ needs to load the class (like the java code class, .class I think), then the object, then the method on the object, then it can call that method. So the program loads the class from self (basically), the loads the class inside of it (EzFlagCheck), then finds the function gibFleg. In Java, this function just returns that string of nofleg.... The intent of this was to just check the end of the string against it for the last 4 bytes, but it was completely broken (see below). For the sake of the writeup, I will assume it was correct, in which case the last 5 bytes would have been 28f6}.
1
2
3
4
5
6
7
8
9
10
11
12
13
uint64_t Java_com_example_backandforth_MainActivity_finalize(_jstring* class, int64_t arg2, uint8_t* arg3)
...
                _jmethodID* object = _JNIEnv::FindClass(class, "com/example/backandforth/EzFlagCheck")
                int64_t rax_10 = _JNIEnv::GetStaticMethodID(class, object, "gibFleg")

                if (rax_10 != 0)
                    // nofleg{356df2f2de7e8c9a1b2d3e4f5692d2b3c4a6728f6}
                    uint8_t* fakeFlag =
                        _JNIEnv::CallStaticObjectMethod(class, object, rax_10)

                    if (fakeFlag != 0)
                        if (strcmp(_JNIEnv::GetStringUTFChars(class, fakeFlag) + 0x2b,
                                &arg1_cstring[0x2b]) != 0)
This was originally a postscript to this, but it needs to go here instead so I can point out how this challenge went wrong… This challenge actually was broken… I guess I did math wrong or changed something at some point and the “fake flag” ended up being one character longer than the real flag, meaning that although that check was set up to check the last 4 characters of the flag + ‘}’, it didn’t actually do so and just failed and accepted whatever… which was a pretty big oopsie. The actual logic is doing a check, and I thought that I understood what was going on but it was late at night and I did not. strcmp returns 0 if the strings are identical, SO by checking if != 0, it’s only continuing if they are not the same, which they never will be bc they are different lengths.
The second part of finalize is, in my opinion, the coolest. I’ll lead with the code and explain after:
1
2
3
4
5
6
7
8
9
10
11
12
13
14
15
16
17
18
19
20
21
22
23
24
25
26
27
28
29
30
31
32
33
34
35
36
uint64_t Java_com_example_backandforth_MainActivity_finalize(_jstring* class, int64_t arg2, uint8_t* arg3)
...
                    if (fakeFlag != 0)
                        if (strcmp(_JNIEnv::GetStringUTFChars(class, fakeFlag) + 0x2b,
                                &arg1_cstring[0x2b]) != 0)

                            uint64_t mt_state[0x27e]
                            seed_MT_state(&mt_state, 0x1337)
                            int64_t method =
                                _JNIEnv::GetStaticMethodID(class, object, "gen")

                            if (method != 0)
                                int64_t stored
                                __builtin_memcpy(dest: &stored,
                                    src: "\x66\x0b\x23\x01\x8a\xe5\x3d\x00\xb5\xb4\x39\x01\x"
                                "7b\x9b\x55\x01\x2e\x74\xdb\x04\x4e\x9c\x26\x00",
                                    count: 0x18)
                                int32_t i = 0

                                while (true)
                                    if (i s>= 6)
                                        var_1431 = 1
                                        int32_t var_1464_7 = 1
                                        break

                                    if (divu.dp.d(
                                            0:(_JNIEnv::CallStaticIntMethod(class,
                                                object, method,
                                                zx.q(gen_number(&mt_state)))),
                                            *(&stored + (sx.q(i) << 2)))
                                            != zx.d(arg1_cstring[sx.q(i + 0x24)]))
                                        var_1431 = 0
                                        int32_t var_1464_6 = 1
                                        break

                                    i += 1
I populated both seed_MT_state and gen_number myself as function names, as those are standard library functions (from std::mt19937, though I’m not using their names here which are both rng). Those can be determined from some crypto constants that can be found in each of those functions for MT19937 seeding and number generation.
The program generates a random number, then uses that to reach back up into the Java and call the gen function with that as an argument. What is the gen function, then? Also in EzFlagCheck, its code is below:
1
2
3
4
public static int gen(int seedVal) {
    Random random = new Random(seedVal);
    return random.nextInt();
}
So it takes our MT19937 random number, then uses that to seed Java’s random number generator and generate a subsequent random number, passing that back to the native code. Once there, the program does a division operation as new_rand / stored[i], where stored is a list of int values (as it’s being indexed in multiples of 4, shown by the i << 2). So each of these final random numbers, when given back to C++, will divide by those stored numbers to result in our flag characters.
To solve this part, I recreated the logic in my own script(s), included with this as gen_bytes.cpp and Main.java. I ran the generation in C++, then did the generation in Java, then actually processed and printed that back in C++. I did run into some trouble with integer conversions between the two so this took longer than I thought it would, but the part of the flag is styl3s, meaning we have: byuctf{*******_*******_4ndr01d_****_styl3s_28f6}.
So… 3 more parts of the flag. Where are they? (this is genuinely me asking myself this btw as I solve it again and forgot how I structured it)
One of them is hiding down at the bottom of finalize(). After the loop for our check of the last two parts, we have this code block:
1
2
3
4
5
6
7
8
9
10
11
12
13
14
15
16
uint64_t Java_com_example_backandforth_MainActivity_finalize(_jstring* class, int64_t arg2, uint8_t* arg3)
...
        char var_1465_1 = 0
        int32_t var_146c_1 = 0

        while (true)
            if (var_146c_1 s>= 6)
                _jmethodID* object = _JNIEnv::FindClass(class)
...

            var_1465_1 += arg1_cstring[sx.q(var_146c_1 + 0xf)]

            if (zx.d(var_1465_1) != zx.d(*(fifo + (sx.q(var_146c_1) << 1))))
                var_1431 = 0
                int32_t var_1464_1 = 1
                break
This is another 6-character piece, as shown by var_146c_1 which triggers the check above once it reaches 6. It just starts adding characters together and comparing them to the saved byte values. This truncates the high bits, but because it’s a value <= 0x7f each time, that’s fine. That’s easy enough to rev with python, and it gives us that part of the flag: thr0ugh
1
2
3
4
5
6
7
8
fifo = b't\x00\xdc\x00N\x00~\x00\xf3\x00Z\x00\xc2\x00'

sum = 0
for i in range(7):
    next_sum = sum + fifo[i*2]
    real = chr(((fifo[i*2] | (next_sum & 0xff00)) - sum)&0xff)
    print(real)
    sum += ord(real)
Just two more parts to go: byuctf{*******_thr0ugh_4ndr01d_****_styl3s_28f6}.
wasm
The next part of the flag check is in the wasm. This is a little funky bc I think I had to wrap the wasm in js, which I then had to wrap in Java. This is all in WasmRunner in the program. The Javascript section is found through string references, as seen earlier: String jsCode = context.getString(R.string.async) + context.getString(R.string.consumeNamedData) + context.getString(R.string.bindgen) + context.getString(R.string.flStr) + escapedFlag + "';" + context.getString(R.string.runcheck) + "})()";
1
(async () => { const wasm = await android.consumeNamedDataAsArrayBuffer('wasm-1'); await wasm_bindgen(wasm); const flagString = 'ESCAPED_FLAG'; return wasm_bindgen.check3(flagString).toString();})()
So it’s loading the data via android.consumeNamedDataAsArrayBuffer to load the wasm with wasm_bindgen, then running a function from that. Simple enough? I was hunting for the actual wasm in the program, and I figured it would be in the assets folder where we found the .sqlite file earlier (I was right), but I wanted to track it down to be sure. I figured the below code was actually processing the wasm bc of its copying data code, so I just found the reference to the string it calls bg (which is pointing to the string bg), which is the name of a file in the assets folder, so bingo.
1
2
3
4
5
6
7
8
9
10
11
12
13
14
15
16
17
18
19
20
21
22
23
        ListenableFuture<byte[]> wasmLoadFuture = Futures.submit(new Callable<byte[]>() { // from class: com.example.backandforth.WasmRunner.1
            @Override // java.util.concurrent.Callable
            public byte[] call() throws Exception {
                InputStream is = context.getAssets().open(context.getString(R.string.bg));
                try {
                    byte[] buffer = new byte[is.available()];
                    is.read(buffer);
                    if (is != null) {
                        is.close();
                    }
                    return buffer;
                } catch (Throwable th) {
                    if (is != null) {
                        try {
                            is.close();
                        } catch (Throwable th2) {
                            th.addSuppressed(th2);
                        }
                    }
                    throw th;
                }
            }
        }, this.backgroundExecutor);
Tracking down the wasm itself, wabt has a lot of great tools you can use (like wasm2wat, wasm2c, and wasm-decompile), but I wanted to try out Ghidra’s wasm decompiler, which worked great! It stores the important wasm in the exports category of symbols, so I found the check3 function in there. Scrolling through, it was a total mess. BUT I was able to make out bits and pieces of the logic…
pointer_to_data = *(undefined8 *)(flag + 7); in the program (labelled of course) is taking a slice of our flag, which I knew to look for because one of the blocks we were looking for started there. I was able to find the part that was looping for our 8 characters by following the brackets of the do while loop, which meant I knew where to narrow dowm my reversing to. The other thing I was suspicious of was this constant: 0x298727a55bfeb500. It was the only real thing popping out in the decompilation, so I figured it would be a part of the check. Especially since our check was 8 bytes, it would make sense that the result could be stored in a 64-bit integer. AND in the section with that, there is a return of a value that is set only if a comparison passes, which is a really good sign. However, I couldn’t easily see how the flag trickled down into there.
I was pretty sure that was the check I was looking for, so I decided to ignore trying to track whatever madness was going on and looked to see if I could find major type stuff. I found some stuff that looked like left rotation by 6, but that didn’t actually lead anywhere so I went back up to the loop.
I think my fundamental first approach to the setup was off. I started looking to see if i could parse through some of the library calls made (the unidentified functions) by the panic messages they came with. The first that came up was this:
1
2
3
4
5
6
7
    iVar9 = unnamed_function_7(&local_70,&DAT_ram_0010053c,&local_40);
    if (iVar9 != 0) {
      panic(s_a_formatting_trait_implementatio_ram_001005a0,0x56,(int)&local_68 + 7,
            &DAT_ram_00100590,&PTR_s_library/alloc/src/fmt.rs_ram_00100000_ram_001005f8);
      do {
        halt_trap();
      } while( true );
This was a formatting trait implementation error on our data, which seems like function 7 is used to format data, so maybe it’s being managed in a weird way. That is strengthened by this line down below, which had confused me before: if (9 < uVar21 - 0x30) {. That’s a classic check to make sure a printable character is a digit, but I had thought that the flag was more than digits based off the fact everything else was a phrase so that didn’t make any sense until the format string came around. Additionally, that is processed here phVar10->magic[0] = (char)(uVar21 - 0x30); which is a typical way to go from number character to int in c.
Then this was the line that had caught my eye from the beginning but I didn’t really know what to do with it:
1
uVar21 = (uint)(byte)*pcVar20 << ((ret ^ 0xffffffff) & 7) | uVar21;
Initially, I had seen the 7 and thought of the encoding where you take an 8-bit encoded value and pack it to 7 bits, so I played around with that i the Python terminal to no luck. But returning to it now and thinking of the fact that we had just pretty printed our flag section into something non-flaggy (my guess was something like {:08b} since we’re working in rust), I realized that the byte pointed to by pcVar20 didn’t need to be a full byte. It was likely either a 0 or 1 WHICH MEANT that it was packing our bit over to one of 8 bits in a byte. Here’s the whole packer:
1
2
3
4
5
6
7
8
9
10
11
12
13
14
15
16
  do {
    if (bVar6 == 2) {
      if (counter == pcVar15) goto code_r0x8000200e;
      bVar6 = 2;
      pcVar19 = counter;
    }
    else {
      if ((bVar6 & 1) == 0) goto code_r0x8000200e;
      bVar6 = counter + 1 < (byte *)uVar2;
      pcVar19 = pcVar15 + (int)counter * (int)uVar3;
    }
    counter = counter + 1;
    if (pcVar19 == (char *)0x0) goto code_r0x8000200e;
    uVar20 = (uint)(byte)*pcVar19 << ((ret ^ 0xffffffff) & 7) | uVar20;
    ret = ret + 1;
  } while( true );
This took me so long to track down. But when you trace upwards, you can find that uVar3 = 0x100000008, uVar2 = 0x800000008, which means that our pcVar19 is actually incrementing by counter * 8, which means it’s taking all of the bits in the same column, if we were to assume it looked like a matrix when all the bits were stored. Then our uVar2 value is used at the top of the else statement as a trigger for our breaking out of this, which is that whenever the counter + 1 is greater than uVar2, it’ll set bVar6 to 0, which will break out of the loop the next time. Since it was taking every 0th bit and placing them all into the same byte, I guessed that it (I) had arranged them into a sort of matrix and was transposing it, WHICH would make total sense given there is a byte of only 0’s. I made a quick Python script to test, and it came out to: j0mp1n6_! I could be done with wasm!!! (Reversing this section took probably 2 hours even though I was the one who originally wrote it about a year ago)
Current knowledge of the flag: byuctf{j0mp1n6_thr0ugh_4ndr01d_****_styl3s_28f6}
The last section
Remember how I said I thought it was doing a whole hash check earlier? I was wrong. The decompliation forgot an argument so I was completely mistaken. Let’s look at the check1 again:
1
2
3
4
5
6
7
8
9
10
11
12
13
14
15
16
17
18
19
20
21
22
23
24
25
26
27
28
29
30
31
32
33
34
35
36
uint64_t Java_com_example_backandforth_MainActivity_check1(_jstring* arg1, int64_t arg2, uint8_t* arg3)
    void* fsbase
    int64_t rax = *(fsbase + 0x28)
    int64_t var_b8 = arg2
    int64_t rax_1 = _JNIEnv::GetStringUTFChars(arg1, arg3)
    SHA256::SHA256()
    uint8_t var_80[0x70]
    SHA256::update(&var_80, rax_1 + 0x1f)
    SHA256::digest()
    uint32_t var_d4 = 0
    char var_a1

    while (true)
        if (var_d4 s>= 0x20)
            var_a1 = 1
            break

        void var_a0

        if (zx.d(*sub_466390(&var_a0, sx.q(var_d4)))
                != zx.d(*(indexes + sx.q(divs.dp.d(sx.q(var_d4), 2)))))
            var_a1 = 0
            break

        var_d4 += 2

    uint32_t rax_3
    rax_3.b = var_a1

    if (*(fsbase + 0x28) != rax)
        __stack_chk_fail()
        noreturn

    int64_t rax_10
    rax_10.b = rax_3.b
    return zx.q(rax_10.b)
NOTICE that the hash is actually starting at 0x1f? Well, I missed that the first time. 0x1f happens to be the location of our one missing chunk. I thought I needed the hash of the whole object here, but it turns out just the end? Remember how I said it missed an argument? Here’s the assembly of the call to update():
1
2
3
4
5
00466932  488bb538ffffff     mov     rsi, qword [rbp-0xc8 {var_d0}]
00466939  4883c61f           add     rsi, 0x1f
0046693d  488d7d88           lea     rdi, [rbp-0x78 {var_80}]
00466941  ba04000000         mov     edx, 0x4
00466946  e8151e0700         call    SHA256::update
Notice that it’s populating edx / arg3? It’s only taking the hash of 4 bytes, which MEANS that we can brute force just those four bytes and finally have our full flag!! I threw together brute.py pretty quickly and ta-da! We have our last chunk: c0d3.
If you played the challenge, hopefully you enjoyed it (minus mayyyybe the wasm lol). If you just read the writeup, hopefully you also enjoyed it :) It was a lot of fun to write
Flag: byuctf{j0mp1n6_thr0ugh_4ndr01d_c0d3_styl3s_28f6}
P.S.: I actually lost all the source code to this challenge when I reimaged my computer a while ago and was careless…. I really enjoyed writing it tho, and the goal was to include as many technologies as I could. There were some that I just couldn’t reasonably fit, such as hermes bytecode or native javascript, since those would have required architecture changes (or the hermes bytecode could have been executed in C++ as hermes ‘shellcode’ basically but I didn’t wanna deal with that since I was already doing pretty much the same thing with wasm). I developed the whole application using Android studio, without AI, and I wrote the wasm code in Rust then compiled it to wasm, though I don’t remember the toolchain I used for that. All in all, it was cool interacting with how many different things I could do inside of an Android application.